How to Build an App with AI: Use Small Prompts, Not One Big Prompt
The fastest way to build an app with AI is not to describe the whole thing in one giant prompt. It is to build small modules, improve each one, test it, and integrate them into a working product. Here is the step-by-step method — with real prompt examples for LogicMint.
Why the Way You Prompt Decides the Result
Building an app no longer requires a development team, months of planning, or expensive custom code. With an AI app builder like LogicMint, you describe your idea in plain language and start generating real screens, workflows, and features from it.
But there is one mistake almost every new user makes on an idea-to-app platform: they try to build the entire application in a single, enormous prompt. It sounds efficient. In practice it creates confusion — too many features, too many assumptions, and too many moving parts at once. The result can look impressive in the preview, yet miss key logic, behave inconsistently, and be hard to fix.
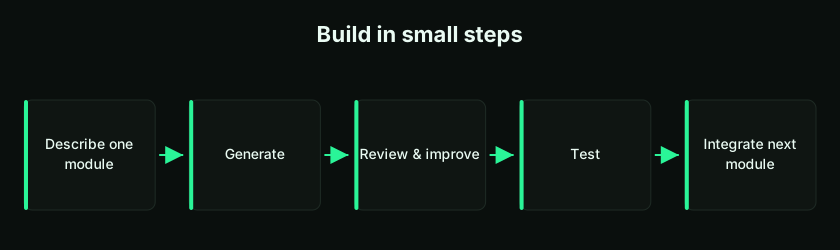
The better approach is simple: do not build the full app in one prompt. Build small parts, improve each part, test it, then integrate everything together. This is how you get a usable product out of a prompt-to-app builder — and it is also how experienced product teams ship software.
What an AI Idea-to-App Platform Actually Does
An AI idea-to-app platform converts an idea into a working application using natural-language prompts. Instead of writing code by hand from scratch, you explain what the app should do and the platform generates the screens, components, forms, dashboards, and business logic. (For the full picture, see our guide to what an AI app builder is.)
For example, you might say:
Create a simple CRM app where a sales team can add leads, track follow-ups, update lead status, and view a dashboard.
The builder generates a first version of that CRM. LogicMint is designed around exactly this loop — helping you move from idea to app through AI-assisted generation, refinement, and integration. But output quality depends heavily on how clearly you instruct it. That is why prompt strategy matters more than prompt size.
Why One Big Prompt Is the Wrong Way to Build an App with AI
Many people start with something like this:
Build a complete e-commerce application with login, product listing, product details, cart, checkout, payment gateway, order tracking, admin dashboard, inventory management, coupons, reviews, email notifications, analytics, mobile-responsive design, and a customer-support chatbot.
The prompt looks complete, but it is far too large. When you ask a builder to generate everything at once, predictable problems follow:
- The app becomes generic, and some features end up half-built.
- The design is inconsistent from screen to screen.
- The workflow does not match your real business process.
- The AI fills gaps with assumptions you never intended.
- Testing is hard because everything was created together.
- Fixing is harder still — you cannot tell which part caused a problem.
It is like asking someone to build an entire shopping mall from one instruction. The sensible way is to build the entrance, then the shops, then the billing counters, then the parking, then security — and connect them. Apps are built the same way: one module at a time.
The Core Method: Build in Modules
The best way to use an AI app builder is to divide your app into smaller modules, where a module is one meaningful part of the application. Take a school homework app:
| Module | What it does |
|---|---|
| Teacher homework page | Teacher creates and manages homework |
| Parent dashboard | Parent views homework assigned to their child |
| Student progress tracker | Tracks homework completion status |
| Admin dashboard | School admin sees all classes and sections |
| Notifications | Sends reminders for due dates |
| Reports | Shows homework-completion performance |
Rather than generating all of this at once, build it in sequence: generate the teacher homework page, improve it, then generate the parent dashboard, connect the two, add progress tracking, then notifications, then reports. The steps below turn that idea into a repeatable workflow.
Step 1: Start with a Clear, One-Sentence Idea
Before touching a prompt-to-app builder, write your idea in a single plain sentence:
I want an app where teachers assign homework and parents track their child's progress.
That sentence is your foundation. Then answer a few grounding questions before you generate anything:
| Question | Example answer |
|---|---|
| Who will use the app? | Teachers, parents, and school admins |
| What problem does it solve? | Homework communication and progress tracking |
| What is the first useful feature? | A teacher can post homework |
| What should users see first? | A clean dashboard |
| What is not needed in version one? | Fees, transport, exams, attendance |
This clarity is what lets LogicMint generate a strong first version. If the idea is vague, the app will be vague too. Our guide on how to present your idea to an AI app builder goes deeper on framing requirements.
Step 2: Build the First Core Module
Start with the single most important module — never the whole app. For the homework app, that is the teacher's homework-creation page. A good prompt is specific:
Create a homework-posting page for teachers. The teacher should add class, section, subject, homework title, description, due date, and an attachment. Display all homework in a clean table with edit and delete options. Keep the design simple, modern, and mobile-responsive.
This works because it tells the AI who the user is, what the page does, which fields are required, how data should be displayed, and what design style to use. That is far more effective than "Build a school app." A focused prompt creates a focused result.
Step 3: Improve the First Module with Small Follow-Ups
Treat the first output as a draft, not a finished screen. Review it honestly: is the form clear, are all fields present, is the table readable, do edit and delete work, is it usable on mobile, does anything important seem missing? Then refine with small, single-purpose prompts:
- "Add filters for class, section, subject, and due date."
- "Add status labels: Pending, Submitted, Reviewed, and Overdue."
- "Improve the layout with cards, clear spacing, and a mobile-friendly table."
- "Add a confirmation message before deleting any homework record."
Each prompt improves one thing, which gives you control and predictable results. Small improvements compound into a genuinely good application.
Step 4: Build the Second Module Separately
Only once the first module works should you move on. Next is the parent dashboard:
Create a parent dashboard where a parent views homework assigned to their child. Show subject, teacher name, due date, description, attachment, and completion status. Add filters for subject and due date. Keep it simple and easy for parents to understand.
You are asking for one specific user view, not the whole platform. Then refine it step by step — add progress states (Not Started, In Progress, Completed, Submitted), surface overdue homework at the top, and add a summary card for totals. Now the app has two solid modules that are easy to test and improve independently.
Step 5: Integrate the Modules
With individual modules working, connect them so they behave as one product:
Connect the teacher homework module with the parent dashboard. When a teacher creates homework for a class and section, it should automatically appear for parents whose children are in that class and section.
This is where the app becomes real: the teacher creates homework, the parent sees it, the parent updates progress, and the teacher reviews the status. The principle is build the parts first, then connect the parts — do not ask the AI to imagine every connection up front.
Step 6: Add Roles and Permissions
Most real applications need user roles, but add them after the main workflow is proven, not before.
| App type | Common roles |
|---|---|
| School app | Admin, teacher, parent, student |
| CRM app | Admin, sales manager, sales executive |
| E-commerce app | Admin, seller, customer |
| Finance app | Admin, accountant, reviewer, approver |
| Booking app | Admin, service provider, customer |
For the homework app:
Add role-based access control. Teachers can create, edit, and delete homework for their assigned classes. Parents can only view homework for their child. School admins can view all homework across every class and section.
Access control matters because real users should only ever see what they are permitted to. If you need to go further, our guide on adding authentication to an AI-generated app covers the checks AI often misses.
Step 7: Polish the Design After the Workflow Works
Many builders fixate on design too early. Design matters — but a beautiful app with broken logic is useless. Make it work first, then make it look professional. Once the flows are solid, prompt for polish:
- "Restyle the UI as a modern SaaS dashboard: clean sidebar, dashboard cards, readable fonts, clear buttons, mobile-responsive."
- "Make the design friendly for non-technical users: clear labels, large buttons, easy navigation."
The order is deliberate: logic, then workflow, then design, then polish. That is how professional apps come together.
Step 8: Test Every Feature Before Adding More
Testing is one of the most important — and most skipped — parts of building with AI. After each module, verify it before moving on: can the user submit the form, is data saved and displayed correctly, do filters and buttons work, does it work on mobile, are error messages clear? When you find a problem, fix it with a precise prompt rather than a vague one:
The due-date filter is wrong. Fix it so users can filter homework by today, this week, overdue, and a custom date range.
"Fix the due-date filter" beats "fix everything" every time. The more specific you are, the more useful the AI's help.
The Prompt Format That Works
A reliable prompt gives the AI enough direction without overloading it. Use this shape:
Create a [module/page] for [user role]. The user should be able to [main action]. Include fields such as [fields]. Display results as a [table/card/list/dashboard]. Add actions such as [edit/delete/view/filter/search]. Keep the design [simple/modern/mobile-friendly].
Applied to a lead-management screen:
Create a lead-management page for a sales manager. They should add leads with name, company, phone, email, source, status, expected deal value, and next follow-up date. Display leads in a table with search, status filter, edit, and delete. Keep the design modern and mobile-responsive.
Step 9: Ship the MVP First
Your first target should be the smallest useful version of the app — the Minimum Viable Product — not the biggest. An MVP solves the core problem and nothing more.
| Feature | In the MVP? |
|---|---|
| Teacher creates homework | Yes |
| Parent views homework | Yes |
| Parent updates progress | Yes |
| Teacher reviews status | Yes |
| School-wide analytics | Later |
| Fee management | Later |
| Exam management | Later |
| AI chatbot | Later |
Trying to build "version 10" on day one creates complexity you cannot manage. Build version 1, launch it, gather feedback, and improve. LogicMint helps you move fast; good product thinking keeps you moving in the right direction. See how to build a SaaS MVP with AI for a fuller roadmap.
Bad Prompt vs Good Prompt
Too broad
Build a complete school-management app with homework, attendance, exams, fees, transport, parent communication, teacher/student/admin dashboards, reports, notifications, and a mobile app.
Focused
Create a homework-management module for teachers. A teacher adds homework with class, section, subject, title, description, due date, and attachment. Display it in a table with search, filter, edit, and delete. Keep the design clean and mobile-responsive.
Follow-up
Create a parent dashboard where parents view homework for their child, filter by subject and due date, and update progress as Not Started, In Progress, Completed, or Submitted.
Integration
Connect the teacher homework module with the parent dashboard so homework appears only for parents whose children are in the selected class and section.
The rhythm is always the same: small prompt, review, improve, next module, integrate.
Worked Example: A CRM in Five Prompts
Do not start with "Build a complete CRM like Salesforce." Build it in stages instead — a pattern we expand on in how to build a CRM with AI:
- Lead capture — "Create a lead-capture page where a sales executive adds name, company, phone, email, source, interest level, expected value, and next follow-up date. Show leads in a table with search and status filter."
- Lead status — "Add statuses New, Contacted, Qualified, Proposal Sent, Won, Lost, with a status badge per row."
- Follow-up dashboard — "Create a dashboard showing leads that need action today, overdue follow-ups, and high-value leads."
- Manager view — "Create a manager dashboard with total leads, qualified leads, won and lost deals, expected revenue, and conversion percentage."
- Integration — "Connect lead capture, status, follow-up dashboard, and manager dashboard so data stays in sync across the CRM."
Worked Example: An E-Commerce Store, Module by Module
The same discipline applies to a store (more in how to build an e-commerce store with AI). Build in this order: product listing → product details → cart → checkout → order history → admin product management → inventory → coupons → payments → analytics. Start focused:
Create a product-listing page for an e-commerce app. Show product image, name, price, category, stock status, rating, and add-to-cart button. Add filters by category, price range, and availability. Keep it clean and mobile-responsive.
Then add the product-details page, then the cart, then connect the three. Building a stable store means finishing and connecting one module before starting the next.
Why Small Prompts Produce Better Apps
Focused instructions reduce ambiguity, and a focused instruction yields a focused result. The practical benefits:
| Benefit | Why it happens |
|---|---|
| Better quality | Each feature gets proper attention |
| Easier testing | You test one module at a time |
| Faster fixes | Issues are easy to isolate |
| Cleaner design | Each screen is polished separately |
| Clearer workflows | User journeys stay manageable |
| Less rework | You avoid rebuilding the whole app |
This is not just a beginner technique. Experienced teams build, test, improve, and release in stages for the same reasons.
When to Add Advanced Features
Add advanced capability only after the core workflow works — one feature at a time, never all in the first prompt:
- "Add an email notification when a teacher assigns new homework."
- "Add WhatsApp notifications for parents."
- "Add a monthly homework-completion report for school admins."
- "Add an AI assistant that helps teachers write homework descriptions."
The same goes for payment gateways, PDF generation, file uploads, approvals, analytics, and API integrations. Layering them one by one keeps the app stable.
How LogicMint Takes You from Idea to App
LogicMint converts plain-language descriptions into working applications — business apps, internal tools, CRMs, dashboards, admin panels, finance tools, booking apps, workflow automations, SaaS MVPs, and e-commerce modules. Explore what it generates on the features page, or start faster from ready-made app templates. For the best results, follow the loop this article describes:
- Define your idea in one sentence.
- Generate the first module.
- Review the output honestly.
- Improve it with small prompts.
- Generate the next module.
- Connect the modules.
- Add roles and permissions.
- Polish the design.
- Test every feature.
- Launch the MVP — then keep improving.
Key takeaways
- Never build a full app in one prompt. Large prompts create generic, half-built, hard-to-fix results.
- Build one module at a time: generate, review, improve, test, then move to the next.
- Integrate after building — finish the parts, then connect them into a workflow.
- Add roles, design polish, and advanced features last, once the core workflow works.
- Ship the MVP first — the smallest useful version — then iterate on feedback.
- Small, specific prompts beat big vague ones on quality, testing, and speed of fixes.
Frequently Asked Questions
What is an AI app builder?
An AI app builder is a platform that creates applications from natural-language prompts. Instead of writing every line of code by hand, you describe what you want, generate app screens, refine workflows, and build software far faster.
What is an idea-to-app platform?
An idea-to-app platform turns a simple idea into a working application. You start with a concept, generate modules, improve features, test workflows, and gradually build a complete product.
Can I build a full app with one AI prompt?
You can try, but it is usually the wrong approach. One large prompt tends to confuse the AI and produce incomplete features. Building in smaller modules and integrating them step by step gives much better results.
What is the best way to build an app with AI?
Start with the core feature, generate one module, test and improve it, then add the next module. Once the main modules work, connect them and polish the design.
Why use small prompts instead of one big prompt?
Small prompts give clearer instructions, so the AI produces cleaner screens, more accurate features, and more coherent workflows. They also make testing and fixing far easier.
Can non-technical users build apps with LogicMint?
Yes. LogicMint lets you describe your idea in plain language and generate modules step by step, so non-technical users can start simple and improve gradually.
What type of apps can I build with LogicMint?
CRMs, booking apps, dashboards, internal tools, admin panels, school apps, finance tools, e-commerce modules, workflow-automation apps, and SaaS MVPs.
Should I build the design or the workflow first?
Build the workflow first and make sure it works. Once the logic and user journey are clear, improve the design, layout, spacing, and mobile responsiveness.
What is an MVP in app development?
An MVP — Minimum Viable Product — is the smallest useful version of an app, including only the features needed to solve the main problem. Once it works, you add more.
How does LogicMint help build an MVP?
LogicMint quickly generates the first version of your app with AI. You start with one feature, improve and test it, and build up to a complete MVP without trying to create everything at once.
Building an app with AI is powerful, but how you instruct it decides the outcome. Start small, build one module, improve it, test it, then build and connect the next. Add roles, design, and advanced features only after the core works. If you have an app idea, generate one simple feature today — then improve it, integrate it, and keep building. Compare plans on our pricing page, or start from LogicMint.